Why is whatsapp banning it user

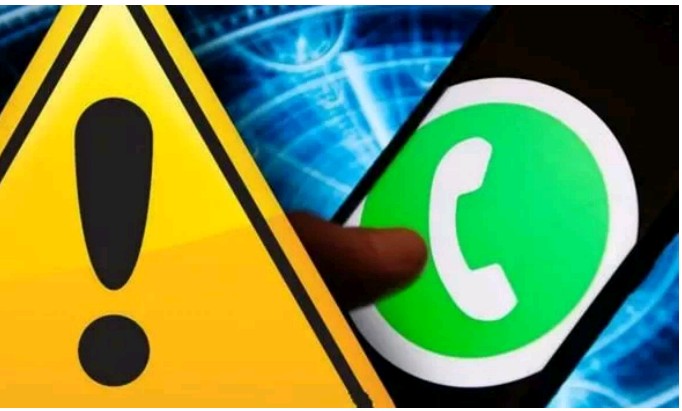
WhatsApp is taking an extreme step to curb the use of third-party apps like WhatsApp Plus and GB WhatsApp (modded apps). The instant messenger app has already started to ban users that are using 3rd party applications like GBWhatsApp, WhatsApp Plus and YOWhatsApp on their Android devices.

WhatsApp has requested it’s users not use such third-party Apps as they aren’t developed by it. And such Apps also violates WhatsApp’s Terms of Services and aren’t safe for its users. On its website, WhatsApp said:
If you received an in-app message stating your account is “Temporarily banned” this means that you’re likely using an unsupported version of WhatsApp instead of the official WhatsApp app. If this is the case, you must download the official app to continue using WhatsApp.
advertisement
Unsupported apps, such as WhatsApp Plus and GB WhatsApp, are altered versions of WhatsApp. These unofficial apps are developed by third parties and violate our Terms of Service. WhatsApp doesn’t support these third-party apps because we can’t validate their security practices.
Why people use GB WhatsApp etc. (modded Apps) and why these apps are being banned
While the company has done a pretty good job of
designing the app and adding features, there are plenty of features that are still missing from the app. In an attempt to fill that gap, developers started creating modded versions of WhatsApp that went above and beyond to make sure users get the features that aren’t present in the actual app. Although this worked out in favor of the users, modded apps do pose a significant threat to WhatsApp and to the users as well in terms of privacy and security. That’s why the company has decided to ban these type of apps.

How to create a YouTube channel

YouTube is the largest online video platform with over 2billion people ever month

The main reason why people like YouTube is that it gives you freedom that you can perform and upload any video .There are no charges to post a video in YouTube.

The are two types of people in YouTube

1: The creators

2:Bussiness owners

The creators artist can create all sorts of video, examples entertainment ,lifestyle and sports

Bussiness owners are people who want to join the online marketing .This means that they want to promote their business by use of YouTube

How to create a YouTube channel

I will show you in the below 4 steps

1:Sign in using a gmail account. Visit http://www.youtube.com and at the right corner on top of your screen click sign up

Log in using your google account

Go to settings and on the right side of the screen click the profile icon then click setting

2:Create your channel First you need to choose an appropriate channel name.Then next below the setting icon,click create a channel

You will be asked whether it’s a bussiness channel or a personal channel .Choose any of those two above then name the channel and choose the right category

Then click done,that all your YouTube channel has been created successfully.

3:Creating the best channel icon

Icon is the picture that appears next to your videos on YouTube watch pages. You have to choose something that really looks good since they reflects your channel .

You can insert an icon by going to your channel’s homepage and clicking on the round image on the left side of your channel’s name.

4:Choose best channel art

This is the most important thing in your channel .
Channel art is just like Facebook cover photo placed at the very prominent location of the screen.
It will tell about your personality and help building a brand name.
Do not forget to add links to other social media platforms and to your website at the bottom right of the channel art.
:(i) How to set channel art?
While setting up the channel you will notice the channel art space on the top with a button saying “Add channel art”. Just click there and add your image.
You’re done! Your new YouTube channel is ready.

Create a YouTube channel and start uploading videos

Top 4 famous bloggers in kenya and their earnings

Do you know the top bloggers in Kenya who make a lot of money through blogging?
These bloggers below will give you some motivation and I know that one day you will be a proffesional blogger just like them and make millions of money.These top bloggers started there blogging journey and know their earnings are good.

Top 4 bloggers in Kenya

You can Learn a lot from their blogs. I know by the end of reading these stories you will be inspired and be motivated.

1:Timothy Obare Riobe(daily post)

Timothy obare riobe is among the best kenyan proffesional blogger. He started a blog Known as Daily post.

Blog:www.kenyan-post.com

His blog talks all about the things that are happening in kenya.It also talks of propaganda and Gossips.Daily post was an instant hit and became one of the best blog in Kenya .Timothy’s blog got more than 1500000 viewers a month and his estimated earning per month is 2 million

2:Samuel Majani (ghafla)

Samuel Majani is a graduate at the university of Nairobi in Kenya.He is also a blogger. He started a blog called GHAFLA. His blog is one of the best known for entertainment.

Blog:www.ghafla.co.ke

His blog receives over 1000000 visitors each month with a monthly earning of 1.5 million per month

3:Abel muhatia(biznews)

Abel is the creator of the bunnies. Co.ke which is an online media agency that delivers news and information on bussiness and technology. He created his first blog in 2013.other thing that Abel’s blog covers are mobile reviews,agribussiness and development news. His site receives over 80000 viewers every month making over ksh 500000 In a month

4:Partrick Gathara (Gathara. blogspot)

Patrick Gatharastarted his blog in the year 2007.He started a blog called Gathara. blogspot.co.ke

Blog. http://www.gathara.blogspot.co.ke.

The unique thing about Gathara.blogspot blog is that unlike other blogs it writes about journalism,cartoons. The good thing about this his blog is that it has sustained since from 2007 and it still does what it has always done.

Patrick blog discuss what is happenings in the country and also gives his opinion.

The site receives about 500000 visitors per month earning over 500000 per month from his blog

These were 4 bloggers in Kenya who can inspire you .Take an inspiration from them and their blog to start your own blog in any given niche.

If you know any Kenyan blogger that I have not listed.Please write his or her name and blog so that I may add to the list

How to Start a Blog that Actually Makes Money – For A Beginner

Some years back ,you had no identity if you did not have an email address. 5 years back it became compulsory to have a Facebook or Twitter account.
But with the next 5years to come blog will be like facebook and istagram.
However that may not be reason I want to tell you to start your own blog now.
Moneycodewin.com is my blog. I have started this blog 2 years ago. I have made alot of money through bloggong.
My blog not only gave me lots of MONEY but FAME as well.
I earned some of my money by Google AdSense which is one of the income from my blog .So today, I will show you how to start a blog in simple steps.There are two types of blog

Free blog

Paid blog

Free blog as many limitations such as 1.your blog will be hosted as a subdoma. 2.it will be lengthy and difficult to read 3 .most client will not take it seriously. Those are some of the limitation of a free blog .i will advice you to use the paid blog which goes for not less than 75$ a month.some of the website that you can use are wordpress,bluehost and blogger . Here are the 6 simple steps that will help you in starting your blog.

  1. Choose a Blogging Platform
  2. How to Select a Domain Name
  3. Select Host for Your Blog
  4. Setup Your Blog
  5. Design Your Blog
  6. Start Making Money with Your Blog. 1.Choose a Blogging platform. ====================== There are a number of blogging platforms like WordPress, Blogger, TypePad, Wix,and etc. But WordPress.org is one of the best blogging platform accordingto me.many blogs in the world use wordpress

some of the reason i choose worldpress:

  1. It’s Free
  2. Creating a blog using WordPress is very easy.
  3. You can design almost any type of website with the help of 5000 free and paid WordPress themes.
  4. It offers 50,000 free plugins that make your blog very fast & efficient.
  5. You can find help on almost any topic on
    WordPress Forum or other blogs.
    Here I am talking about WordPress.org and not free blogging platform WordPress.com.
    WordPress.org is a software and its free. You need to buy a domain and hosting for using this WordPress.org platform.
  6. How to Select a Domain name =========================
    Choose your domain name wisely that evryone can understand the purpose of your blog .
    The domains should be easy to pronounce and remember.
    choose a domain name in such a way that people can understand the topic of your blog.
    You can find many domain extension other than ‘.com’. Most of the other common domain extensions are .org, .net, .co.uk, .co.in, .info etc.
  7. Select Host for Your blog ========= ===========
    You can not create your blog using just software. You need a web hosting space where you can install WordPress software. you need web hosting to store the content of your blog, images and videos.
    You need to buy a web hosting in order to use your own domain name and to make it accessible to the world.
    I have created hundreds of blogs in the last 8 years, and I have used & experienced almost all the web hosting providers.
    One of most reliable hosting I found is from Bluehost.
    Even WordPress.org and other to bloggers recommend http://www.bluehost.com .
  8. Setup your blog == ==========
    Just visit http://www.bluehost.com.Click on “Get Started Now” button. You then visit the hosting plan page.
  9. Choose Your hosting plan
    There are 3 types of plan. If you are planning to start only 1 blog, then ‘ basic’ is sufficient for you but if you want to create more blogs in future, then you can choose ‘ Prime ’ because you can use multiple blogs in the same hosting. You even get Domain Privacy for free.
  10. Type Your Domain Name
    Next it ask you to type your domain name. I have already discussed above how to choose the domain name for your blog. If you have something in mind then enter it in ‘new domain’ and check for availability.
    You can try different names for your domain and if your finalize a domain then click “Next”.
    If you have an existing domain with another domain registrar, then you can use that with Bluehost hosting. You can type that domain name in the “I have a domain name” field and Click ‘ Next ’.
    There are many domain extensions other than .com. It’s not necessary to use ‘.com’ domain extension only. You can try other extensions like .net, .org, .info and others as shown in the image above.
  11. Complete Signup Process
    Next step in starting a blog is completing your registration. You need to put your information and other formalities.
    Put your signup with your Google account.
  12. Choose your plan =============== I recommend you to buy for 36 months because you get the lowest rate of $2.95 per month if you choose for 36 months.
  13. If you buy for 12 months, then the price is $4.95 per month.
  14. You will get ‘Let’s Encrypt SSL’ free for all plans. SSL will make your site from ‘http’ to ‘https’.
  15. You don’t need to buy SiteLock Security, Codegurad Basic and Bluehost SEO Tools.
  16. You can buy ‘Domain Privacy Protection’ which help you to protect you from Spammers. Bluehost give the offer of $2.65 per month for a 36 months plan.
  17. Place order to start your blog
  18. Next, scroll down and enter your credit card details. You can also pay by your PayPal account. Choose whatever suitable for you.
  19. Then tick the checkbox of ‘Terms of Service’ button and click on ‘Submit’ button to complete the order.
  20. You then visit the next page where Bluehost welcome you for purchasing the hosting towards the first step start your blog.
  21. Create your password
  22. Now click on the green button to create your password.
  23. Create a strong password. Bluehost will suggest you if your password is weak.
  24. Click ‘Next’ button.
  25. On the next page, you will be asked to choose a theme for your blog.
  26. If you like any theme for your blog, you can choose now, otherwise, click on ‘Skip’ button at the bottom to choose your theme later.
  27. Bluehost host your blog on a temporary domain for 12-24 hours if you had chosen your domain name as explained above in step 2.
  28. Even if you had selected ‘Choose Later,’ even in that case, your blog will be hosted on a temporary domain, and when you book your domain later, it automatically removes the temporary domain and adds your own chosen domain.
  29. Now you can start creating your blog .
  30. Here you can either go directly to your WordPress blog dashboard by clicking on ‘Start Building.
  31. You can login to your WordPress account of your blog directly from this page.
  32. Design Your Blog
  33. You need to do some of the most important things immediately after creating your blog.
  34. Complete WHOIS verification
  35. If you chose a new domain in step 2 ‘Type Your Domain Name’ above, then you will receive a WHOIS Verification email. Open your email and click on “Verify Your Email” link to activate your domain.
  36. Then log in to WordPress account by clicking on “Log in to WordPress” from your Bluehost account.
  37. After login It ask you ,Business or Personal site. Just click on ‘I don’t help link.
  38. Create a new user with Administrator Role
  39. This is the first thing to do after starting a blog. When Bluehost installs WordPress on your hosting, it provides you with the default username ‘admin’ which is not good. Spammers and hackers can attack your blog with spam and malware.
  40. You need to change this with strong username and password.
  41. There is no provision to change the username in WordPress. You need to create a new user and delete the default user ‘admin’.
  42. Click on ‘Users’ as shown in the image and then ‘Add New’.
  43. Enter the details of the new user. Username, Email, First & Last Name.
  44. Click on ‘Show password’ to see the password of your WordPress blog. If you want, you can change.
  45. Choose Role as ‘Administrator’.
  46. Find here the details of your WordPress blog account.
  47. WordPress Login URL: https://YourDomain.com/wp-admin (replace YourDomain with your domain name)
  48. Username & Password will be as given in the above steps.
  49. Now logout of your WordPress account and login again with new username & password using the above login URL link.
  50. Again go to ‘Users->All Users’.
  51. Select ‘admin’ user and delete this or change the role to ‘Subscriber’.
  52. Install a theme after starting your blog
  53. You need to install or change your theme when you start a blog. There are thousands of free & paid themes provided by thousands of developers. A theme will change the overall design, style, and layout of your blog.
  54. You can click on ‘Appearance –> Themes –> WordPress.org Themes’ to find free themes provided by WordPress.
  55. Do some experiments with the free themes and check which one you like the most. Chose a responsive theme so that it will be compatible with the smartphone.
  56. There are hundreds of premium themes outside WordPress provided by different companies. My favorite theme is Genesis provided by StudioPress. Premium themes have more features and easy to customize.
  57. Install important plugins
  58. WordPress plugins are like apps that allow you to add new features and functionality to your WordPress blog. You must install some essential plugins for creating your blog.
  59. Click on ‘’Plugins –> Add New’ and search for these plugins to install and activate.
  60. Yoast SEO : One of the best plugin for on-page SEO and other things like creating a sitemap.
  61. JetPack Plugin : Already installed by Bluehost. You click on JetPack plugin and then click on Setup button to setup this plugin. It’s is a multipurpose plugin where you can add things like contact form, share buttons, site stats and many other things.
  62. Akismet Anti-Spam : This plugin will protect you from comment spammers. This plugin is already installed by Bluehost. You need to activate the plugin and go to the settings and then click “Get Your API Key” to get your free API Key for free to use this plugin.
  63. WP Smush: Images are the great way to enhance the quality of your posts, but images take lots of storage space and at the same time slow down your blog. This plugin optimizes and compresses your image without reducing the quality of your images. It results in less storage and faster speed.
  64. Change the permalink
  65. Permalink is a great way to create a clean & SEO friendly URL. Just click on Settings -> Permalink to change your settings. Just select the ‘Custom Structure’ and enter /%postname%/ in the text box and click the “Save Changes”.
  66. Add your first post
  67. You must write at least 1000 word blog post on your favorite topic based on your blog. Images make your content more attractive so add quality images in your post.
  68. You can find the images on sites like Pixabay, Canva to use on your blog.
  69. Click on ‘Posts –> Add New’ to add your first post.
  70. Add your title and content with images and click on “Publish” button to publish the post.
  71. Congratulation! You have published your first post.
  72. Start Making Money with Your Blog
  73. Different people have different purpose of starting a blog. Someone may use this as a hobby or personal blog. Someone may use this as a business blog. Alternatively, someone wants to become a professional blogger.

Design a site like this with WordPress.com
Get started